Friday, November 18, 2016

After 8 Rewarding Years, My Carolina Kitchen Says Good-bye

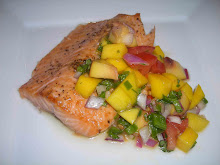
Salmon with Marsala Sauce

My Carolina Kitchen quietly celebrated its 8th blogging anniversary this past October. I feel that 8 wonderful years is a respectable time to say good-bye.

I am not planning on disappearing totally. I hope, from time to time, to post some of our new favorite recipes on My Carolina Kitchen 's Facebook page, link here, and hope you'll follow along.  altogether.

Blogging has been a wonderful journey for me and brought great pleasure into our lives. I have truly enjoyed getting to know each of you and I thank you for your continued support of My Carolina Kitchen. Along the way Meakin and I have been fortunate enough to have met a number of you in person and we will always treasure those friendships.

Before I say my final good-bye, I would like to share an idea with you. In the last several months I’ve been creating new recipes from old favorites. This idea is not novel or new, but I’ve found it to be truly rewarding and I think you will too.

Here’s how it works – find one of your favorite recipes, choose a component from it, and take that component to create a new recipe.

As an example, I choose Pork Marsala and took the Marsala sauce from Pork Marsala, link here, as the component and, instead of serving it over pork, I served it over salmon.

Pork Marsala


What I discovered was that the Marsala sauce was equally as delicious on salmon as it was on pork. Take a look.

Salmon with Marsala Sauce


Broiled Salmon with Marsala Sauce
Adapted from Pierre Franey, 60 Minute Gourmet & First Home Love Life – serves 4 
Printable Recipe 

1 1/2 pounds boneless fresh salmon fillets, preferably with the skin intact
2 to 3 teaspoons grape seed oil, or other neutral tasting oil
Kosher salt or sea salt & freshly ground black pepper

Cut the salmon into four pieces approximately the same size and weight. Put salmon on a plate, rub with oil, season with salt & pepper, and allow the salmon to sit at room temperature for 10 to 20 minutes.

Preheat the broiler. Arrange the salmon in one layer, skin side down, on an unheated sheet pan lined with heavy duty foil for easy clean-up. Place the salmon under the broiler about six to seven inches from the source of heat. Broil 8 to 10 minutes or just until the pieces are cooked through. It is not necessary to turn the salmon. If salmon starts to get too crispy on the top, change from broil to bake and bake at 400 degrees until done. Do not overcook or the salmon will be dry. Allow to rest for a few minutes, then  serve with the Marsala sauce.

Marsala Sauce 
Slightly adapted from First Home Love Life, serves 4
Printable Recipe

2 tablespoons extra-virgin olive oil
2 tablespoons butter
8 ounces sliced baby bella mushrooms
2 peeled and thinly sliced shallots
2 peeled and chopped garlic cloves
½ cup dry Marsala wine
½ cup low-sodium, low fat chicken broth or homemade
1 tablespoon chopped fresh thyme leaves or 1 teaspoon dried
4 fresh thyme sprigs for garnish

Heat olive oil and butter in a 10” non-stick skillet over medium-low heat. Add the mushrooms and sauté, stirring occasionally until they have rendered their juices and are brown. Add shallots and garlic and cook for 1 – 2 minutes more, taking care that the shallots and garlic don’t burn. Add the Marsala wine and chicken broth. Using a wooden spoon, scrape up the fond (brown bits) from the bottom of the pan. Add the chopped fresh thyme, stir to incorporate, then cover the pan and let simmer for about 5 to 8 minutes more.

If the sauce has not thickened to your liking, make a slurry of arrowroot (or cornstarch) and cold water and mix equal parts of arrowroot and water in a small dish and stir with a spoon. Then stir the slurry into the sauce until the sauce is sufficiently thickened. Serve hot. This sauce goes well with pork, salmon or chicken.

Chicken Marengo

Another new recipe was created from another old favorite – Chicken Marengo, shown above, link here. I took the Marengo sauce and served it over lean, bone-in pork chops and it too was a hit. (I apologize for no photo – the dish was half gone before I remembered to photograph it.)

Marengo Sauce
Slightly adapted from “With a Jug of Wine” by Morrison Wood, serves 4
Printable Recipe

2 tablespoons olive oil
4 small white onions, peeled & chopped
1 small clove of garlic, minced
1 ½ cups sliced fresh mushrooms
2 tablespoons minced parsley
4 tomatoes, peeled and sliced (canned, crushed first, are fine, including their juices)
1 cup dry white wine
1 tablespoon brandy
1 tablespoon tomato paste
1 tablespoon flour
Chopped fresh flat-leaf parsley for garnish

Heat olive oil in a large non-stick skillet over medium heat and sauté chopped onions, garlic, mushrooms, parsley in 2 tablespoons olive oil. Cook this mixture, stirring occasionally, until the mushrooms are tender. Add the tomatoes and their juices, dry white wine, brandy, tomato paste and 1 tablespoons flour. Mix and blend the ingredients well and allow to simmer over a medium flame for about 20 to 25 minutes. Serve the sauce hot over pork chops or chicken breasts garnished with chopped parsley.

You get the idea I’m sure. Here’s another example of taking a component from one recipe and trying it in another.

Chicken Provencal


I chose a Provencal sauce as the component and, instead of serving it over chicken, (link here) I served it over pork and it was excellent as well.

So voila, as you can see, new recipes can be created from old favorites and at the same time your recipe file will expand. Creating new recipes is rewarding and fun experiment. I hope that you’ll give it a try.

For better viewing, chick photos to enlarge.

Before I go, once again I want to thank each of you for your support of My Carolina Kitchen through the last 8 years. I hope that you’ll continue to try new recipes as well as experimenting with old ones. I know I plan to l continue to do the same.

I'm not planning to totally disappear. From time to time I plan to post some  of our new favorite recipes on My Carolina Kitchen's Facebook page, link here, and I would love it if  you to followed along.

I’ll leave you with some wise words from Julia Child.

Moderation. Small helpings.
Sample a little bit of everything. These are the secrets of happiness and good health.

- Julia Child

Thursday, September 22, 2016

Remodeled Kitchen and Butler’s Pantry Reveal


I’ve been missing in action for a while and after you see our new kitchen and butler’s pantry you’ll know why I've been very, very busy putting the contents of the kitchen back into order. Not only did we have to move back into the kitchen, but at the same time, we’ve had to merge our North Carolina kitchen “stuff” with our Florida stuff. Take my word for it, it is not easy nor is it quickly done to blend together two completely furnished kitchens. Thank you for your patience and for sticking with me through it all.
For better viewing, click photos to enlarge.

Here are the results of our remodeling. You’ll see that one wall of cabinets and the pantry are a grey wash (see photo above) and the remainder of the kitchen cabinets are white. You probably can’t tell it in this shot, but the refrigerator is “counter depth” - making it is much more attractive than a normal refrigerator that would stick out in the walkway.

The entire kitchen upper cabinets have the latest ultra-modern 12 V LED Under Cabinet Tape lights, link here, and strategically placed LED ceiling can lights, all on dimmers. The china cabinet has glass shelves and a light  in the cabinet that shines down on the plates.


You may remember that the top cabinets in our original kitchen blocked the view into the den (see the photo below the Kitchen Aid storage), which made the kitchen seem small and cramped. Now the kitchen opens up into the adjoining den and the cramped feeling is now completely gone. Also in this same area is a lower cabinet that contains a pop-up Kitchen Aid stand mixer and another pull out for separate garbage containers, one for trash and the other for recycling.


Below is the original kitchen layout, looking into the den.

Original kitchen

One of the main reasons we bought this house was because it was light and bright and we loved the idea of doing prep work at the sink while enjoying the view of the lanai and pool area.


The new sink is a Silgranit sink by Blanco. We chose it because it is made of an ultra durable patented formula that makes the sink resistant to heat, scratches, stains, chipping and fading. Plus no harsh chemicals are needed to keep the sink clean day-to-day, promoting a green lifestyle.

We installed two new Miami-Dade approved hurricane glass sliders. After the cost of the cabinets, the two new doors were the second largest expense of the project, but well worth every penny if you live in a hurricane area.

The picture below show the layout of the original 1970’s kitchen. Kitchens of that era often had unattractive drop-down ceiling, which was the rage at the time. The drop-down ceiling was eye-sore and now that it’s gone and I say good riddance. The new ceiling and upper cabinets are higher throughout the kitchen. You’ll notice that the original lay-out was crowded and awkward with the refrigerator directly across from the stove. That passage way so narrow that if anyone was working at the stove and you wished to pass, you had to say “excuse me” to fit through.

Original Kitchen Layout
You’ll see that we changed the lay-out of the kitchen, moving the stove to the spot where the refrigerator was and the refrigerator is now out of the way and located between the coffee bar and the tall pantry.


The counters are Quartz, which are practically indestructible, plus we are thrilled that they look as close to marble as we could find and they go very well with the marble backsplash subway tiles. The new louvered pocket door opens into the dining room, replacing an ugly plain pocket one. The stove is a duel fuel stove (gas on top with an electric oven), which we liked in our house in the mountains, plus a microwave convection oven above with a vent-out exhaust fan. The vent-out exhaust fan is amazing. As an example, when the burners start to produce a lot of heat, the vent comes on automatically.

One of our main goals for the kitchen was to provide a lot of storage that was easily accessible. Above you’ll notice two deep drawers on both side of the stove for pots and pans, located conveniently to where they’ll be used.

Below is a large pantry with pull-out drawers located to the right of the refrigerator. It’s wonderful to be able to see all of the pantry items when you pull out the drawers. No more having to move what’s in the front of the cabinet to see what’s in the rear. I wonder how many times in the past that I’ve bought an item because I couldn’t see and thought I was out of it and come home to find it when I returned from the store.


Here are just two examples of the many deep drawers we've wanted in our kitchen for so many years. The first drawer contains a standard Cuisinart and its blades, plus a mini Cuisinart, a variety of au gratin dishes, an egg poacher, and two sizes of kitchen scales.


The second one has plenty of storage for a mixer, 2  Immersion Blenders, a mandolin, an assortment of glass nesting mixing bowls, a cheese grater and several pie plates.


Above the refrigerator, as you can see below, is ample storage for sheet pans in two sizes, trays, spring form pan and muffin tins, extra cutting boards, and china serving platters.


And finally, something that we’ve wanted for a very long time and my personal favorite thing in the new kitchen – a built-in spice rack. It was built-in between two by fours, out of the way yet very convenient.


Now on to the Butler’s Pantry where the old bar and laundry room were. Below is the entry coming in from the garage. As you can see the room is long and narrow, making it hard to photograph, but here goes.

I call it a butler’s pantry because it’s a multi-purpose room – a laundry area is at one end with a front loader washer and dryer and plenty of storage space in upper cabinets. A long counter above the machines connects the laundry to the remainder of the room. At the other end is a bar with a built-in wine cooler with temperature controls for white and red wine. Above the bar the upper cabinets have glass shelves with built-in lighting shining down on the  contents. These cabinets provide a place for glass wear and the good china. This room, like the kitchen, has the recessed LED can lighting in the ceiling and 12 V LED Under Cabinet Tape lights, all on dimmers.


Again again as in the kitchen, more really nice drawers. One set, right under the bar area, behind the two cabinet doors has a custom built bottle storage drawer. The drawers have custom made dividers so prevents the bottles from clinking together and leaning on each other.


The two photos below show the area we originally had used for a bar  and the original laundry room. As you can see, it was a long room, divided by a sliding door, separating the laundry room from the area we used as a bar. You can see how unattractive they were.

Original bar and laundry room

The remodeling in this area posed a real challenge – specifically how to replace the tiles that will be missing when the pocket door is torn out. Our super-talented and detailed minded tile mason was able to find tiles so close to the original that you wouldn’t notice the difference unless we pointed it out.

Original laundry room and bar 

Our project came in on time and on budget, a rarity in the remodeling world. I give all of the credit to my husband Meakin, who acted as the General Contractor of the job and by doing so saved us at least 20% of the cost of the total project.

We have owned many houses over the years and have improved every one. That and the fact that we built one of our Bahamas houses on our own gave us a good feeling about our ability to tackle this project.

Meakin did a fantastic job of coordinating the various sub-contractor’s schedules with regard to timing. He also pulled all of the necessary permits for the job himself and worked very closely with the County, scheduling and supervising the various inspections, then made sure that any corrections or changes needed were completed, which gave the County Inspectors a good feeling about the whole job. Meakin had fun and the results were beautiful.

We owe a huge thank you to Owen Thompson, owner and designer of Accurate Kitchens and Baths in Fort Myers, Florida. Without his knowledge, experience and good taste, our kitchen would have never turned out as beautiful as it did. Owen’s installation crew are the ones that built the custom spice rack in the kitchen and the wooden dividers for the drawer in the butler’s pantry that house the liquor. Owen recommended that we use a group of talented tradesmen with whom he has worked with in the past and he was familiar with their skill levels and ability to work together.

We’ve remodeled numerous houses over the years and I have to say this was the most successful job we’ve ever completed and it’s all is due to how well everyone worked together as a team.

For better viewing, click photos to enlarge.


Thursday, April 21, 2016

Pork Marsala


We’ve prepared Pork Marsala several times in the past few weeks and the sauce alone is worth making this dish. Truthfully I had forgotten how much I love Chicken and Veal Marsala. So when I spotted this recipe using pork on Pinterest from First Home Love Life, I knew we had to try it.

Using a wine such as Marsala gives a restaurant-quality finishing touch to dishes. In this particular case the Marsala is simmered in chicken broth along with meaty baby bella mushrooms and shallots, giving the dish a rich and complex character.

Marsala wine is a fortified wine produced in the region surrounding the city of Marsala on the island of Sicily. It has a raisin-like flavor and is served at room temperature. Although we mostly think of Marsala in cooking, traditionally it was served between the first and second course of a meal or on its own with a tasty cheese. Marsala can also be served as an after dinner drink.

There are two varieties of Marsala - dry or sweet. The dry is used for savory dishes and adds a nutty flavor and carmelization to the fond of veal, chicken or beef dishes. The sweet is used mainly in desserts such as zabaglione and tiramisu.

This upscale sauce alone is reason enough to try this dish. If you need more of an incentive, it’s simple to make and comes together quickly in 30 minutes or less.


Pork Marsala 
Slightly adapted from First Home Love Life, serves 4
Printable Recipe

4 boneless pork chops, about ¾ to 1” thick
About 1/3 cup all purpose flour for dredging
½ to 1 teaspoon garlic powder
Kosher salt and freshly ground black pepper to taste
2 tablespoons extra-virgin olive oil
2 tablespoons butter
8 ounces sliced baby bella mushrooms
2 peeled and thinly sliced shallots
2 peeled and chopped garlic cloves
½ cup dry Marsala wine
½ cup low-sodium, low fat chicken broth or homemade
1 tablespoon chopped fresh thyme leaves or 1 teaspoon dried
4 fresh thyme sprigs for garnish

On a plate or a piece of waxed paper, mix flour and garlic powder together. Season pork chops with Kosher salt and freshly ground black pepper on both sides. Dredge the seasoned pork chops in the flour and garlic powder mixture, then tap off excess.

In a non-stick sauté pan, add olive oil and butter and heat the pan over medium-high heat. When butter is frothy, add pork chops to the pan, turning once, allowing both sides to get golden brown. When pork reaches an internal temperature of 145 degrees F, which is medium rare, or 160 degrees F, which is medium, remove the chops to a plate and cover. (These temperatures are the guideline from the National Pork Council. We like our pork chops a little pinker, around 138 degrees F.)

Lower the heat to medium-low and add mushrooms and sauté, stirring occasionally until they have rendered their juices and are brown. Add shallots and garlic and cook for 1 – 2 minutes more, taking care that the shallots and garlic don’t burn. Add the Marsala wine and chicken broth. Using a wooden spoon, scrape up the fond (brown bits) from the bottom of the pan. Add the chopped fresh thyme, stir to incorporate, then cover the pan and let simmer for about 5 to 8 minutes more.

If the sauce has not thickened to your liking, make an arrowroot & water slurry (mix equal parts arrowroot and cold water in a small dish with a spoon), then stir the slurry into the sauce until the sauce is sufficiently thickened.

Serve the sauce over the pork chops, then garnish each chop with a fresh sprig of thyme. Mashed or oven roasted potatoes make a nice accompaniment.  

Variation: If you like, add a teaspoon of Dijon mustard to the sauce, which is always good with pork, when the fresh thyme is added.

For better viewing, click photos to enlarge.

This recipe will be shared with Foodie Friday at Rattlebridge Farms and Miz Helen’s Country Kitchen’s Full Plate Thursday.

We hope you’re having a nice week 
and thank you for visiting My Carolina Kitchen. 


Wednesday, April 13, 2016

Individual Savory Apple, Blue Cheese & Walnut Tarts


We’ve found that by using puff pastry your dishes can look more professional. Take for instance this Provencal Tomato Tart that we made last summer when juicy vine-ripened tomatoes were in season, served atop puff pastry and can be found here.

Today we’ve made individual savory puff pastry tarts with apples, blue cheese, and walnuts, served for a light lunch with a green salad tossed with a tart lemony vinaigrette (recipe here) & a few grape tomatoes thrown in for color. This savory apple tart would also make a nice starter dish for dinner. We’ve found that guests really like it when they get their own individual tart made just for them.


This apple tart recipe is from one of my favorite cookbooks – The Lazy Gourmet, Magnificent Meals Made Easy by Robin Donovan & Juliana Gallin. It’s a cookbook I often turn to for sophisticated recipes that are also easy. You might remember one of my all time favorite dishes to serve for dinner guests - Baked Chicken with Lemons & Olives, which can be found here. Well it happens to be from The Lazy Gourmet too. I recently served it for a small family reunion at our home the week prior to Easter and it was a big hit. One of the best things about this recipe is that the crispy potato wedges bake alongside the chicken at the same temperature and the same cooking time. That alone makes life a whole lot easier for the cook.

The authors suggest several different combinations you might try. What if you substituted figs, apricots or pears for the apple and used Gruyere, a sharp Cheddar, or Manchego in lieu of the blue cheese. Or you could turn this dish into a dessert by using ricotta in place of the blue cheese and omitting the black pepper. Let you imagination be your guide in creating your own individual tarts.

This tart is best served right out of the oven, but if you want to make it ahead an hour or so (or happen to have leftovers), the tarts can be re-heated in a 400 degrees F oven until heated through, about 5 minutes.


Individual Savory Apple, Blue Cheese & Walnut Tarts
Very slightly adapted from The Lazy Gourmet, Magnificent Meals Made Easy by Robin Donovan & Juliana Gallin, makes 4 individual tarts
Printable Recipe

1 sheet frozen puff pastry, defrosted
A bit of flour for your board
1 medium sweet tart apple, such as a Pink Lady, also known as a Cripps Pink, quartered, cored & sliced into 1/8” thick slices (I used a Cripps Pink, but a Honeycrisp or a Fuji are also excellent)
4 ounces Cambozola (a cheese that’s a combination of a French soft-ripened triple cream & Italian Gorgonzola), or other mild blue cheese of your choice, thinly sliced or crumbled
¼ cup chopped walnuts
1 tablespoon honey
Freshly ground black pepper
Beaten egg (optional)

Preheat the oven to 400 degrees F. Lightly oil a baking sheet.

Unfold the pastry sheet on a lightly floured surface. Cut sheet into 4 squares and place on the prepared baking sheet. Prick the dough with a fork to release steam and prevent it from puffing up, taking care not to prick the 1” outer edge because you want that outer edge to puff up.

Lay 4 apple slices, slightly overlapping in the center of the square. (You may have a few apple slices left over as a cook’s treat.) Follow with the cheese, then the chopped walnuts, a drizzle of honey and lastly a few grinds of freshly ground black pepper over each tart. If you desire a nice brown glaze on the tart, brush the outer edges with a beaten egg as a final step.

Bake the tart in a preheated oven for 15 to 20 minutes, until pastry is golden brown and nicely puffed up around the edge. Serve warm.

Cook’s note: The tart is best served warm out of the oven. However, it can be made ahead a couple of hours and reheated in a 400 degree F oven for about 5 minutes, until reheated.

For better viewing click photos to enlarge

I will be sharing this dish with Foodie Friday at Rattlebridge Farms and Miz Helen’s Country Kitchen’s Full Plate Thursday.

Thank you for visiting My Carolina Kitchen
& we hope you have a nice weekend.

Wednesday, April 6, 2016

Pat Conroy’s Crab Cakes - his legacy to the food world


Pat Conroy, one of the great writers of our time, passed away this last March at this home in Beaufort. He wrote many best sellers including Beach Music, South of Broad, and of course The Great Santani. In honor of Pat, I am revisiting his fabulous crab cake recipe today. The original post titled “How to Make Great Crab Cakes” is from back in 2014 and can be found here. Pat was not only a wonderful writer, he also knew his way around the kitchen. Anytime Pats name comes up in a conversation, I always ask, “Have you read his cookbook?” And the answer invariably is, “No, I didn’t know he wrote a cookbook.” Well he did and it’s called The Pat Conroy Cookbook, Recipes of My Life. The book is filled with top quality recipes, but to me the best part of the book is the stories he shares about the recipes. The book is a novel within a cookbook. And his crab cake recipe is one of the best recipes in his cookbook and I believe his legacy to the food world.

A cute story I’ll pass along about Pat’s crab cakes. His wife novelist Cassandra King says that Pat said to her when they first met that, his crab cakes are so good I’ll want to marry him after tasting them. They were and I did". True story.

Photo from Amazon 
When it comes to crab cakes, in my opinion most crab cakes fall into one of two categories – they are either “great” or “not-so-good”. It’s not difficult to pinpoint what’s wrong with the “not-so-good” ones – they’re either over-cooked or under-cooked, too greasy, or so full of fillers that the sweet taste of the fresh crab doesn’t come through.


But what makes a crab cake “great?” I believe the secret is in the preparation.

First and foremost, don’t load the crab cakes with a bunch of fillers, such as crushed crackers or lots of breadcrumbs.  When you buy an expensive, quality ingredient like fresh lump meat crab, you want to taste the crab and not much of anything else. Also I beg you, please don’t substitute canned crab or fake crab. Buy the best lump crab you can afford.

Second, when you’re assembling the crab cakes, don’t over handle them. The best way I’ve found to mix the ingredients together is to use your hands. How many times have you heard that clean hands are the best tools in your kitchen? This is one of the times your hands beat any other utensil in the kitchen.

Third, chill the crab cakes in the refrigerator for an hour or so.  Because you aren’t using fillers, you don’t have much a binder in this recipe to hold the cakes together, so chilling is essential.

The last and possibly the most important thing that I’ve learned for perfectly cooked crab cakes is from Pat Conroy. In his book The Pat Conroy Cookbook, Recipes of My Life, Pat shares the “southern secret” for perfect crab cakes, Pat says:

1) The fat must be sizzling hot when you add the crab cakes
2) Cook the cakes for two minutes on each side and
3) Turn them once.

That’s Pat’s secret, pure and simple.

A quick tip – a thin fish spatula, such as the shown one below from Williams Sonoma, is the perfect tool for lifting and turning delicate cakes or any fish to prevent them from falling apart. It’s an essential and inexpensive tool if you cook a lot of seafood, which we do. It’s also perfectly designed for flipping fried eggs.

Fish spatula from Williams Sonoma

Today I’ve made my version of Pat’s crab cakes, following all of the ideas above, but I urge you to try Pat’s recipe from his cookbook, which can be found here. I like just a couple of squeezes of fresh lemon juice on my crab cakes, but Pat has a little bit fancier sauce napped with a lemony butter sauce and capers that’s also delicious and can be found here & here.

Enjoy!


Pat Conroy’s Crab Cakes
Adapted slightly from The Pat Conroy Cookbook – makes 8 cakes
Printable Recipe

1 pound lump crabmeat, picked over & cleaned, with all shell fragments removed
1 egg white, lightly beaten until just foamy but not stiff
1 tablespoon flour
2 tablespoons finely chopped scallions, white part only (or finely chopped chives)
1 teaspoon freshly ground black pepper
Several sprinkles of hot sauce to taste (I used Tabasco)
Small, small dash of Worcestershire sauce, taking care not to overpower the delicate flavor of the crabmeat
Pinch of Old Bay crab boil seasoning
2 teaspoons kosher salt (divided)
3 tablespoons unsalted butter
2 teaspoons peanut oil (don’t use olive oil, it will overpower the taste of the crab)
Lemon wedges

Place the cleaned crabmeat in a medium mixing bowl. Pour the foamy egg white over the crabmeat slowly, stopping occasionally to mix it through. When the crabmeat has absorbed the egg white and feels slightly sticky to the touch (about 30 seconds or so), dust the flour over the crabmeat, then sprinkle the chopped scallions, freshly ground black pepper, hot sauce, Worcestershire sauce, Old Bay, and a scant teaspoon of salt evenly over the top of the crabmeat.

With clean hands lift the crabmeat from the bottom of the bowl, turning over very gently with your hands to mix the ingredients, taking care not to over handle the crab. Separate into 8 equal portions and gently roll each between the flattened palms of your hands to form loose balls. Flatten slightly and transfer to a plate. Sprinkle both sides with the remaining teaspoon or less of salt, cover gently with wax paper, and (very important) refrigerate the cakes for at least one hour before cooking.

Line a baking sheet large enough to hold 8 crab cooked cakes with paper towels and set aside. Melt half of the butter and oil together in a heavy, 10” non-stick skillet, until the mixture is foamy and begins to brown. Cooking the crab cakes in two batches, carefully place 4 of the crab cakes in the hot fat and fry until a crust forms, turning only once, about 2 minutes per side.

Remove the crab cakes and drain on the prepared pan. Cover loosely with aluminum foil to keep warm while you make the second batch. To prepare the pan for the second batch, carefully pour off the cooking fat from the first batch and discard, wipe out the pan, and return to the heat. Prepare the second batch of crab cakes using the remaining butter and oil. Serve hot with lemon wedges. Our favorite way to serve them is on baby arugula, but watercress or baby greens are equally good.

For better viewing, click photos to enlarge.

I will be sharing this recipe with Foodie Friday at Rattlebridge Farms and Miz Helen’s Country Kitchen’s Full Plate Thursday.

Have a great week  
& thank you for visiting My Carolina Kitchen.