Showing posts with label How to's. Show all posts

Monday, August 20, 2012

How to Broil Salmon + a Peach Salsa


Some people are intimidated when it comes to broiling salmon. Don’t be. Broiling is one of the easiest and fastest ways to prepare salmon and it is my preferred method. Plus, if you line your broiling pan with heavy duty foil, there’s practically no clean up necessary. I have used this recipe for years and it has never let me down.

Start with boneless fresh salmon fillets, preferably with the skin left intact. Allow the salmon come to room temperature, drizzle with a little oil, season with salt and pepper, and cook for about 8 to 10 minutes under a pre-heated electric broiler and voila, dinner is ready.

For the oil, I prefer grape seed oil because of its clean, neutral flavor and moderately high smoke point, which is important when you broil. Any other neutral tasting oil, such as canola can be substituted.

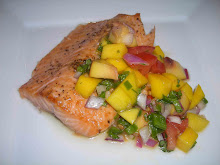
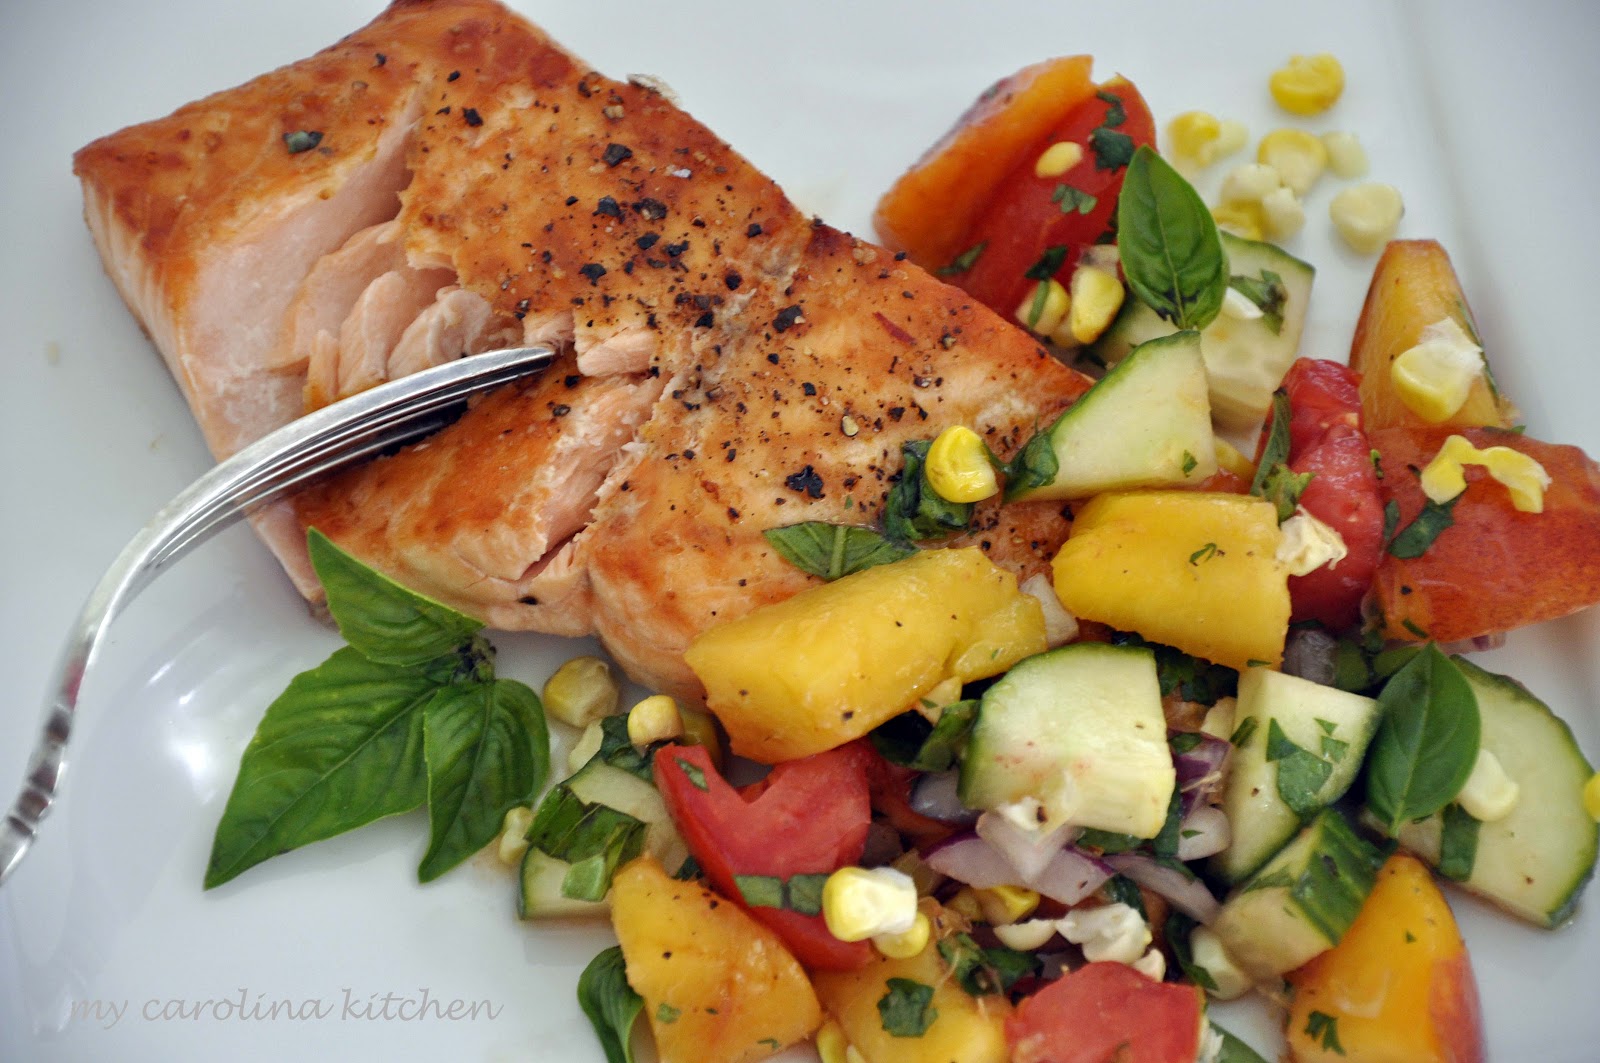
I’ve topped my broiled salmon with a peach salsa that includes tomatoes, fresh corn kernels, red onion, crunchy cucumber, and plenty of fresh basil tossed together in lemony vinaigrette. All of the ingredients are readily available at summer farmer’s markets. The cucumber gives the salsa a crunchy surprise. Nectarines could easily be substituted for the peaches.

Never fear broiling salmon again with this super easy method.


Broiled Salmon in an Electric Broiler 
Adapted from Pierre Franey, 60 Minute Gourmet – serves 4 

1 1/2 pounds boneless fresh salmon fillets, preferably with the skin left intact
2 to 3 teaspoons grape seed oil, or other neutral tasting oil
Kosher salt or sea salt & freshly ground black pepper
Lemon wedges or unsalted butter, optional

Cut the salmon into four pieces approximately the same size and weight. Put salmon on a plate, rub with oil, season with salt & pepper, and allow the salmon to sit at room temperature for 10 to 20 minutes.

Preheat an electric broiler. Arrange the salmon in one layer, skin side down, on an unheated sheet pan lined with heavy duty foil for easy clean-up. Place the salmon under the broiler about six to seven inches from the source of heat. Broil 8 to 10 minutes or just until the pieces are cooked through. It is not necessary to turn the salmon. If salmon starts to get too crispy on the top, change from broil to bake and bake at 400 degrees until done. Do not overcook or the salmon will be dry. Allow to rest for a few minutes (just like you would meat or chicken) on the pan before serving. If you wish to remove the skin, slide a metal spatula between the salmon and the skin after it rests on the pan.

If desired, dot with a tiny bit of unsalted butter or squeeze a few drops of lemon juice on the top. These are not necessary if you are serving the salmon with a salsa.


Peach Salsa
From My Carolina Kitchen – makes 4 servings

4 medium sized tomatoes, cut into small chunks
1 cup chopped European seedless cucumber
1 cup fresh corn kernels, blanched
½ cup chopped red onion
Sea salt and freshly ground black pepper
2 small peaches, peeled, seeded, and cut into small chunks
¼ cup fresh basil leaves, julienned
A sprig of fresh basil for garnish if desired

Vinaigrette:
1 tablespoon freshly squeezed lime or lemon juice
3 tablespoons extra-virgin olive oil
Several dashes of hot sauce such as Tabasco, optional

Place the tomatoes, cucumber, corn, and red onion in a bowl and gently toss with a rubber spatula. Season with salt and pepper. In a jar with a tight fitting lid, combine the vinaigrette ingredients together, shake well, and set aside.

Prepare the peaches and fresh basil and add to the tomato vegetable mixture just before serving. Toss very gently with a rubber spatula, add the vinaigrette. Again toss gently, then taste for seasonings and adjust accordingly. Garnish with a sprig of fresh basil and serve at once.


* * *

This recipe will be linked to On the Menu Monday at Stone Gable, Miz Helen’s Country Kitchen Full Plate Thursday, and Foodie Friday at Rattlebridge Farms.

Eat More Fish


Thursday, July 12, 2012

How to Make Great Crab Cakes


Crab cakes tend to be a dish I order in a restaurant, not prepare at home. Perhaps because over the years I’ve eaten some “great” crab cakes and some “not-so-great” ones. It’s not hard to pinpoint what’s wrong with the “not-so-good” ones – they are either overcooked or undercooked, greasy, or so full of fillers that the sweet taste of the crab doesn’t come through.

But what makes a crab cake “great?” It’s in the preparation and I think I’ve found some answers.

First and foremost, don’t load the crab cakes with a bunch of fillers, such as crushed crackers or breadcrumbs.  When you use an expensive, top drawer ingredient like fresh lump meat crab, you want to taste the crab and not much else. 

Second, when you’re assembling the crab cakes, don’t over handle them. The best way I’ve found to mix the ingredients together is to use your hands. How many times have you heard that clean hands are the best tools in your kitchen? This is one of the times your hands beat any other utensil.

Third, chill the crab cakes in the refrigerator for an hour or so.  Because you aren’t using fillers, there's not much of a binder to hold the cakes together.  So chilling is essential.


The last and possibly the most important things I’ve learned are from one of the country's best known story tellers, and that’s none other than the bestselling novelist and fellow southerner Pat Conroy, of The Prince of Tides and Beach Music fame to name a few. He also happens to be a cook extraordinaire and knows about everything you need to know about seafood. In his delightful and highly recommended by me cookbook , The Pat Conroy Cookbook, Recipes of My Life, Pat shares the Southern secret for perfect crab cakes - the fat must be sizzling hot and, for perfectly cooked crab cakes, cook for two minutes on each side, turning once. That’s it, pure and simple.

Today I’ve made my own version of Pat’s crab cakes, following all of the suggestions above, but I urge you to try Pat’s recipe from his cookbook which can be found here. He also has a little bit fancier version napped with a lemony butter sauce and capers that’s also delicious and can be found here.

Enjoy!


Crab Cakes
Adapted slightly from The Pat Conroy Cookbook – makes 8 cakes

1 pound lump crabmeat, picked over & cleaned, with all shell fragments removed
1 egg white, lightly beaten until just foamy but not stiff
1 tablespoon all purpose flour
2 tablespoons finely chopped scallions, white part only (or finely chopped chives)
1 teaspoon freshly ground black pepper
Several sprinkles of hot sauce to taste (I used Tabasco)  
Small, small dash of Worcestershire sauce, taking care not to overpower the delicate flavor of the crabmeat
Pinch of Old Bay crab boil seasoning
2 teaspoons kosher salt (divided)
3 tablespoons unsalted butter (divided)
2 teaspoons peanut oil (divided)
Lemon wedges

Place the cleaned crabmeat in a medium mixing bowl. Pour the foamy egg white over the crabmeat slowly, stopping occasionally to mix it through with your hands. When the crabmeat has absorbed the egg white and feels slightly sticky to the touch (about 30 seconds or so), dust the flour over the crabmeat, then sprinkle the chopped scallions, freshly ground black pepper, hot sauce, Worcestershire sauce, Old Bay, and a scant teaspoon of salt evenly over the top of the crabmeat.

With clean hands, lift the crabmeat from the bottom of the bowl, turning over very gently with your hands to mix the ingredients, taking care not to over handle the crab. Separate into 8 equal portions and gently roll each between the flattened palms of your hands to form loose balls. Flatten slightly and transfer to a plate. Sprinkle both sides with the remaining teaspoon or less of salt, cover gently with wax paper, and refrigerate for at least one hour before cooking.

Line a baking sheet large enough to hold 8 crab cooked cakes with paper towels and set aside. Melt half of the butter and oil together in a heavy, 10” non-stick skillet, until the mixture is foamy and begins to brown. Cooking the crab cakes in two batches, carefully place 4 of the crab cakes in the hot fat, not allowing them to touch, and fry until a crust forms, turning only once, about 2 minutes per side.

Cook’s tip: A thin fish spatula is perfect for lifting and turning delicate crab cakes or fish to prevent them from falling apart. An essential and inexpensive tool if you cook a lot of seafood, which I do. (See the recipe index for 28 other seafood recipes). In fact, we use it so often we have one in both houses. 

Remove the crab cakes and drain on the prepared pan. Cover the pan loosely with aluminum foil to keep the crab cakes warm while you make the second batch. To prepare the pan for the second batch, carefully pour off the cooking fat from the first batch and discard, wipe out the pan, and return to the heat. Prepare the second batch of crab cakes using the remaining butter and oil in the same manner as above. Serve hot with lemon wedges. 


I will be sharing this recipe with Foodie Friday at Rattlebridge Farms, Miz Helen’s Country Kitchen’s Full Plate Thursday, Foodie Friday at Simple Living, Foodie Friday at Not Your Ordinary Recipes, On the Menu Monday at Stone Gable & Food on Friday at Carol's Chatter.

Have a great weekend everyone.