Thursday, May 29, 2014

Chocolate Raspberry Tart – decadent, yet easy to make


As you know I don’t make desserts very often but when I do, it has to be for someone important to me and also it has to have a wow factor. Our sister-in-law’s birthday was last week and we decided to make something special for her. She and her husband are in the midst of remodeling their kitchen including their living & dining room so you can imagine what their house must be like without a kitchen in the middle of a 5 week major project. Yes, she absolutely deserved a very decadent treat on her birthday.

I scoured cookbooks and magazines for something decadent and I stumbled across this chocolate raspberry tart from an old Martha Stewart’s Everyday Food magazine. As you know I’m not much of a baker, but the minute I laid my eyes on the picture I knew I found something really spectacular. I always make a point of reading the on-line reviews and when I saw that one reviewer said, “It was too easy to make for how delicious it was,” that gave me confidence to think that I could pull it off. Plus I knew I could count on a little backup help from Meakin if I got in over my head.

The tart looked every bit as good as it did in the picture in the magazine and it came together as easily as promised. You can make it a day ahead and keep it in the refrigerator, but if you do, add the raspberries at the last minute. A flat-bottom metal 1-cup dry measuring cup is very helpful to press the cookie dough firmly into the tart pan around the edges.

So for all you non-bakers such as myself out there that are looking for an easy and decadent dessert to impress your family or guests, this chocolate raspberry tart is for you.


Chocolate Raspberry Tart
Adapted from Everyday Food by Martha Stewart– serves 9
Printable Recipe

32 chocolate (about 8 ounces) chocolate wafer cookies – I used Nabisco Famous chocolate wafers found in the baking aisle or on-line at Amazon
2 tablespoons sugar
Coarse salt
6 tablespoons (3/4 stick) unsalted butter, melted
12 ounces dark chocolate chocolate chips (or semisweet if you prefer)
1 ¼ cups heavy cream
1 ½ cups (6 ounces) fresh raspberries

Preheat oven to 350 degrees F. In a food processor, combine cookies, sugar and ½ teaspoon salt. Process until very fine crumbs form. Add melted butter and pulse until mixture comes together. Press crumbs firmly into a 9-inch fluted tart pan with a removable bottom. Place tart pan on a baking sheet and bake until crust is dry and set, about 18 to 20 minutes. Let cool.

In a large bowl combine the chocolate chips and a pinch of salt. In a small saucepan, bring the cream to a bare simmer over medium-high heat. Take care not to let it boil. Immediately pour cream over chocolate chips and let stand one minute. Stir gently until chocolate melts and mixture is completely smooth. Pour chocolate into cooled tart shell, scatter raspberries on top, and refrigerate until set, about 30 minutes. To serve, remove tart from pan.

Cook’s notes: Use a flat-bottom metal 1-cup dry measuring cup to press the cookie dough firmly into the tart pan at the edges. Graham crackers can be substituted for the chocolate wafers, but the tart won’t be as intensely chocolate. It can be made one day ahead and kept in the refrigerator, but add the raspberries at the last minute.


This will be shared with Foodie Friday at Rattlebridge Farm, Miz Helen’s Country Kitchen Full Plate Thursday, Foodie Friday at Simple Recipes and Food on Friday at Carole's Chatter.  

Have a great weekend everyone.

Wednesday, May 21, 2014

An Updated Version of Jezebel Sauce – also known as Dixie Relish


Are you familiar with Jezebel sauce, also known as Dixie relish? Apparently it’s an old Southern staple, but somehow in my Deep South upbringing, Jezebel sauce escaped my life completely. Recently an inviting picture of Jezebel sauce served over nicely charred pan-roasted chicken appeared in Garden & Gun magazine (read more about the magazine at the end of the post). It caught my eye and I instantly became intrigued with the sauce named Jezebel and wanted to know its origin.

According to Garden & Gun magazine, one of the great authorities on life in the South, “Jezebel sauce is a base of apple jelly and pineapple preserves tricked out with horseradish and yellow mustard and traditionally served with a baked ham or spooned over cream cheese and served with crackers.” Maybe if you grew up with it you might love it as you do other old family favorites such as Thanksgiving’s green bean mushroom soup casserole. But from the description above the overly sweet sauce just doesn’t sound very appealing to me.


Flash forward to today. Tandy Williams, Chef at City House in Nashville, Tennessee, has totally reworked this old South classic and has brought  Jezebel sauce into the twenty-first century. He caramelized red onions on the grill, then mixed them with grainy mustard and horseradish for a nice tang. Then he added marmalade and sorghum (another Southern staple) to give the sauce a nice depth of flavor and squeezed some fresh lemon juice to give it a nice tart edge. Now that’s more to my liking.

Chef Tandy serves Jezebel sauce over chicken thighs, pan-roasted to perfection in a black cast iron skillet in a hot oven, which is what I’ve done today along with green beans as a side dish. I readily admit that at first I was a bit skeptical about whether I or not I would like Jezebel sauce, but by the same token I was anxious to give the updated version a try. We both thought the slightly tangy, slightly sweet sauce was outstanding and it will definitely be a “have-again” at our house. I also think that Jezebel sauce would be fantastic served with any cut of grilled or roasted chicken or pork chops. It’s so good that it just might become a staple in my refrigerator.

Memorial Day weekend is coming up. If you’re planning on cooking out, I suggest that you make a jar of Jezebel sauce and give it a try yourself over chicken or chops. I’m planning on serving it on grilled hot dogs this weekend. I predict Jezebel sauce, or Dixie relish if you prefer, will surprise you how good it is as much as it did me.    


Red Onion Jezebel Sauce 
Adapted from Garden & Gun & Tandy Wilson, Chef at City House in Nashville, Tennessee– serves 4
Printable recipe

2 medium red onions
Kosher salt and freshly ground black pepper
2 tablespoons grainy mustard – I used a grainy Creole mustard
2 tablespoons fresh horseradish, grated – I used prepared, drained well
2 tablespoons lemon marmalade – I used orange
1 tablespoon sorghum – I used honey
1 lemon (zest lemon first if making the pan-roasted chicken thighs)

Cut the top and exposed root off of the onions, then peel and quarter from top to bottom. Brush onion quarters with the oil and season with salt and pepper.  Prepare a charcoal grill, or heat a gas grill, or alternately roast onions on a baking pan in a preheated 400 degree F oven, cut side down until browned on the bottom. Let the onions cool, then chop into small pieces.

Mix together the mustard, horseradish, marmalade, sorghum, and juice form the lemon. Fold in the onion & season with salt and pepper. Place the sauce in a jar with a tight fitting lid and refrigerate overnight. Sauce can be refrigerated for up to two weeks in the refrigerator. Before using the sauce, remove from the refrigerator to take the chill off.

If desired, serve the sauce with pan-roasted chicken thighs (recipe below) or other roasted or grilled meats of your choice.


Pan-Roasted Chicken Thighs
Adapted from Garden & Gun & Tandy Wilson, Chef at City House in Nashville, Tennessee– serves 4
Printable recipe

4 chicken thighs, bone-in and skin on
Zest of one lemon
Kosher salt
Freshly ground black pepper
Olive oil (or vegetable or canola oil)

The day before serving the dish, zest lemon and season chicken thighs with salt, pepper, and zest. Cover and refrigerate at least four hours or overnight.

When ready to cook, remove the chicken (and the Jezebel sauce) from the refrigerator to take the chill off. Place a 12-inch cast-iron skilled in the oven and preheat to 425 degrees F. When the pan is hot, remove it from the oven and add two tablespoons of oil and then the chicken, skin side down. Roast for 15 to 17 minutes, or longer if needed depending on your oven (ours took over 20 minutes) until the chicken skin is crispy and the meat is just cooked through.

To serve, place a quarter cup of Jezebel sauce on the plate, add a piece of chicken, then top with another spoonful of sauce. Green beans go nicely with this dish.


With regard to Garden & Gun magazine, if you love the South or enjoy knowing more about it and have never read Garden & Gun magazine you are in for a real treat. I find that the magazine goes much more in depth about life in the south and its food and culture than other publications, samples of covers above. The word gun in the title refers to the sport of hunting and Southern gentlemen, much like the English, have always loved grand old hunting lodges and have a soft spot in their heart for their hounds. My fathers two sweet old bird dogs accompanied me in my baby stroller everywhere I went and stood guard until it was time to go home.

When I first heard of the magazine I wondered about the name and here’s what Rebecca Darwin, President and CEO of Garden & Gun has to say.

What’s in a Name?
“I am often asked about the title of the magazine, particularly from folks who have not read the magazine yet. The simplest explanation that I can offer is that it is a metaphor for the South—its land, the people, their lifestyle, and their heritage.” Rebecca Wesson Darwin, President and CEO, Garden & Gun


This will be shared with Foodie Friday at Rattlebridge Farm, Miz Helen’s Country Kitchen Full Plate Thursday, Try a New Recipe Tuesday at Home to 4 Kiddos, and Foodie Friday at Simple Recipes.  

Have a great weekend everyone and if you are in the states, 
Happy Memorial Day.


Thursday, May 15, 2014

Macaroni & Cheese with Spanish Chorizo & Grilled Chicken Tapas


Are you surprised to see macaroni & cheese on My Carolina Kitchen? Not nearly as surprised as I was the day I ordered it at a tapas bar. It just doesn’t sound like something I would do, does it? I normally go for healthy dishes like seafood and salads. Here’s how it happened.

One afternoon last month we went to see a simulcast of Puccini's opera La Boheme Live from the Met HD series and on the way home from the theater we stopped by one of our new favorite spots in Fort Myers, Cru in the Bell Tower Shops (the same place I discovered the fabulous Caesar kale salad featured a couple of weeks ago here). It was too late for lunch and too early for dinner, but we joined the others in the bar for tapas. One of the tapas specials caught my eye - macaroni and cheese with Spanish chorizo and grilled chicken tapas.


For some reason lately and I don’t know why, I’ve been fascinated with chorizo. Do you ever get on a food kick and not sure why? Anyway, I ordered the macaroni and cheese tapas with the chorizo. It took only one bite and I was truly blown away. The flavors of the smoky chorizo coupled with the creamy macaroni paired very well with the grilled chicken and cheese. I insisted that Meakin try it (before I ate the whole thing myself) even though he kept telling me that he was busy with his two tapas - tuna tartare and short ribs. He basically ignored me until I nagged and nagged him. He finally gave in and had a taste. He was as impressed as I was and agreed that we should try to duplicate it at home. So here it is.    

I baked the macaroni in individual ramekins just as they did at Cru, but a large ovenproof casserole would work fine. Be sure to use the Spanish chorizo, a cured smoked sausage and not to be confused with the Mexican version of chorizo, a fresh ground pork sausage that must be cooked before eating. This is a very substantial tapas dish with 3 cheeses and 2 meats and serves six to eight. We served it with an arugula salad dressed in a lemony vinaigrette and called it lunch.


Macaroni & Cheese with Spanish Chorizo & Grilled Chicken Tapas
Inspired by Cru in Fort Myers, Florida 
Serves 6 to 8
Printable recipe

10 ounce grilled boneless skinless chicken breast
7 ounces of fully cooked Spanish style cured smoked chorizo sausage
1 pound of small corkscrew rotini or similar small pasta
4 ounces Gruyere cheese, thinly sliced
6 to 8 individual ceramic ramekins, depending on their size (I used 7 ounce ramekins similar to these but square)
Softened butter for greasing the ramekins

After the chicken has cooled, cut it up along with the chorizo into bite size pieces and set aside. Cook pasta in boiling salted water according to the package directions until al dente. Drain and rinse the pasta quickly to stop the cooking. Place in a large bowl and set aside while you make the sauce.

Sauce:
Adapted from Mark Bittman’s How to Cook Everything

2 ½ cups milk
2 bay leaves
3 tablespoons butter
3 tablespoons all-purpose flour
1 ½ cups freshly grated sharp Cheddar cheese
½ cup freshly grated Havarti cheese
½ cup freshly grated Italian Parmigiano-Reggiano cheese
Kosher salt and freshly ground black pepper to taste

Cook the milk with the bay leaves in a small saucepan over medium-low heat. In about 5 minutes or so when small bubbles appear along the sides, turn the heat off and let the milk stand.

In another small saucepan, melt 3 tablespoons of the butter over medium-low heat. When the butter is foamy, add the flour and cook, stirring until the mixture browns, about 5 minutes or so. Remove the bay leaves from the milk and add about ¼ cup of the milk to the hot flour mixture, whisking all the while. As soon as the mixture becomes smooth, add a little more milk and continue to do so until all the milk is used up and the mixture is thick and smooth. Add the Cheddar and havarti and stir well to combine.

To assemble:
Preheat the oven to 400 degrees F. Pour the sauce over the cooked noodles, toss in the Parmesan, grilled chicken and chorizo pieces, stir until combined, then season to taste with salt and freshly ground black pepper. Grease the custard cups with the butter and turn the noodle mixture into the cups. Top with slices of Gruyere cheese and bake the macaroni and cheese mixture in the oven (I put the ramekins on a sheet pan) until the Gruyere melts and the macaroni is heated through, about 15 minutes. Serve hot.


I highly recommend Cru if you find yourself in the greater Fort Myers / Cape Coral / Naples, Florida area.  It’s an upscale restaurant located in the Bell Tower Shops and reservations for the restaurant are a must during season, link here. Feel free to stop by their outside lounge or the bar inside any time you are in the area and no reservations are needed there. Or do what we did and enjoy their Tapas Bar, menu here plus daily specials, during Happy Hour from 4 to 7. Cru is a real happening place.

This will be shared with Foodie Friday at Rattlebridge Farm, Miz Helen’s Country Kitchen Full Plate Thursday, & Foodie Friday at Simple Recipes. 

Have a great weekend everyone.

Thursday, May 8, 2014

Hearty Ham and Cheese Muffins for On-the-go Breakfasts


These hearty ham and cheese muffins are great for on-the-go breakfasts for days when you’re too busy to cook in the mornings. They can be made a day or two in advance and stored in an airtight container for a couple of days or wrapped individually in plastic wrap and placed in individual zip lock bags. The cheese and ham helps keep the muffins nice and moist and they can be eaten either at room temperature or reheated gently in the microwave.

When Rizzi from The New York Baking Company asked me if I would like to try their silicone baking cups, I was thrilled because it gave me an opportunity to pull out one of my favorite muffin recipes from the files to use to test the baking cups. Made from BPA free silicone and FDA approved, the cups are nonporous, stain proof, and reusable. They are amazingly flexible and my muffins released perfectly from the cups after baking in a 400 degree oven. They are so colorful that you can’t help but smile as you fill the cups with the batter. Kids will find them a lot of fun to use too. The silicone baking cups are available at Amazon, link here, for $9.95. They are oven and microwave safe and can be used in the dishwasher. With these fabulous silicone cups I’m now environmentally friendly. There’ll be no more peeling the paper off with crumbs falling everywhere when I bake muffins - no more paper muffin cups for me.


I’ve never seen another recipe quite like these muffins because in addition to flour, they contain cornmeal and grits and remind me somewhat of southern cornbread in taste and texture, meaning they are hearty and have body and aren’t the cakey rather sweet cornbread I associate with northern style. This recipe has been in my files for a very long time and I don’t remember where it came from. I cut the ham and cheese cubes a bit too small this time. They should be about the size of an English pea. With the cheese and ham the muffins are very filling and would also make a nice breakfast at home with a smear of red raspberry jam or sweet butter and a glass of orange juice.


Hearty Ham and Cheese Breakfast Muffins
From My Carolina Kitchen - yield 1 dozen muffins
Printable recipe

1 cup all-purpose flour
½ cup cornmeal
2 teaspoons baking powder
½ teaspoon salt
2 ounces cooked ham (I used a ham steak), cut into cubes the size of English peas
2 ounces extra-sharp Cheddar cheese, cut into the same size cubes as the ham
1 cup milk
½ cup instant grits
3 tablespoons neutral tasting oil such as canola
2 large eggs, beaten

Preheat oven to 400 degrees F.

Combine flour, cornmeal, baking powder, salt, chopped ham and cheese cubes in a large bowl. Make a well in the center and set aside.

Place milk in a small saucepan. Cook over low heat, stirring constantly, until mixture reaches 120 to 130 degrees F. Remove from heat and cool to 105 to 115 degrees F.  Sprinkle the instant grits into the warm milk and stir well to combine. Combine the oil and eggs into a bowl. Add the warm grits mixture and stir to combine. Add this mixture to the dry ingredients from above, stirring just until combined. Spoon batter into muffin cups (I used silicone baking cups) that have been coated with cooking spray, filling ¾ full.  Bake in a pre-heated 400 degrees F oven for 20 – 25 minutes.  I like to check for doneness about 5 minutes prior to what the recipe calls for since ovens can vary.

Muffins can be made a day or two in advance and stored in an airtight container for a couple of days or wrapped individually in plastic wrap and placed in individual zip lock bags. Yield: 1 dozen.


This will be shared with Foodie Friday at Rattlebridge Farm, Miz Helen’s Country Kitchen Full Plate Thursday, Foodie Friday at Simple Recipes, & Food on Friday at Carole's Chatter.  
Have a great weekend everyone and to all the mothers, 
I hope you have a very happy Mother’s Day.

Thursday, May 1, 2014

Kale Caesar Salad with Smoky Bacon and Cashews - A Fresh New Spin on a Classic


Everyone and I do mean everyone in the food world these days is talking about kale. Chefs and bloggers feature it because it’s one of one of the healthiest foods around and it is considered a super food. For example, my friend Kate at A Spoonful of Thyme recently featured a couple of delicious recipes using fresh kale including baked kale chips and a rustic cannellini kale and sausage soup. All of a sudden I began to feel like the last person on earth to jump on the kale bandwagon and frankly, I felt a little left out.

When I spotted a Kale Caesar salad on the menu at Cru, one of our favorite new restaurants in Fort Myers, Florida, I plunged in and ordered it as a first course with my steak. It was served on ice cold plates and was out-of-this-world amazing - I ended up eating every bite. I was so pleased with myself that I had finally taken the plunge and tried kale. Now I’m a fan along with the rest of the world.


Caesar salads are one of my favorite salads and I’ve been making my own Caesar vinaigrette for years. I found that you don’t need to use a raw egg to achieve the creaminess in the dressing if you add a little good mayonnaise to the vinaigrette. One of the tips to a great Caesar salad is not using just any old Parmesan cheese but buying real Parmigiano-Reggiano from Italy, freshly grated at the last moment of course. Anchovies are a must in Caesars and instead of using the paste, I use those packed in oil and mash them into a paste myself with a fork. In my opinion they are far superior to the paste in a tube and it only takes a few minutes to mash them yourself. Again, buy the best anchovies you can find.

You’ll see in the recipe below I say add "to taste” and encourage you to taste as you go. This is so important when making anything, especially a salad. Taste, taste, and taste again & add what’s needed. Tasting is the single most important thing you can do and it separates a good dish from a mediocre one. This is so, so important. If you get nothing else out of what I’ve written, please remember to taste as you go and adjust when necessary.
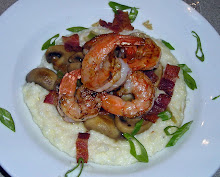
We thought serving the Caesar on ice cold plates as Cru did made a big difference in the entire experience, but it’s up to you. I believe you’ll really enjoy Cru’s take on a Caesar salad with kale, smoky bacon and crunchy cashews.  If you don’t think it’s a Caesar without the croutons, by all means make some homemade ones. It’s super easy and takes only a few minutes, link to my favorite homemade crouton recipe here.


Kale Caesar Salad with Smoky Bacon and Cashews
Inspired by Cru Restaurant, Fort Myers, Florida – serves 2
Printable recipe

4 handfuls of organic curly kale, stems removed and torn into small bite size pieces (or chopped)
¼ cup chopped roasted cashew nuts (I used a combination of salted and unsalted), more if desired
2 slices thick smoked bacon (I used applewood), cut into lardons and cooked until crispy
My Carolina Kitchen’s Caesar Vinaigrette, recipe follows
½ cup freshly grated Italian Parmigiano-Reggiano cheese
Maldon sea salt, or any good coarse sea salt
Freshly ground black pepper
2 salad plates, chilled in the freezer

In a large salad bowl, toss together the kale, cashews and bacon lardons. Add about half of My Carolina Kitchen’s Caesar Vinaigrette and toss to combine with the salad ingredients. Taste and add more vinaigrette as needed. Add the grated cheese and toss again. Season with a little coarse sea salt and freshly ground black pepper and taste once again for seasonings, adjusting as necessary. Serve immediately on ice cold plates. You may have a little left-over vinaigrette and if so, refrigerate for later use.


My Carolina Kitchen’s Caesar Vinaigrette (made without raw eggs)
Sam Hoffer, My Carolina Kitchen - serves 2 – 3, easily doubled or tripled
Printable recipe

1 tablespoon good red wine vinegar or freshly squeezed lemon juice
3 tablespoons best quality extra virgin olive oil
3 to 4 drops of Worcestershire sauce, or more to taste
1 tablespoon good mayonnaise, preferably homemade or Hellman’s (please don’t use Miracle Whip, it’s too sweet)
¼ teaspoon Dijon mustard, or to taste
3 oil packed anchovy fillets, drained well & brought to room temperature if refrigerated (or more if you really like anchovies)
½ teaspoon pressed garlic, or more to taste

In a jar with a tight fitting lid, add vinegar and olive oil and shake well to combine. Add the Worcestershire sauce, mayonnaise and Dijon mustard and shake again to incorporate.
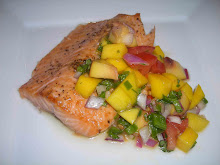
In a large salad bowl mash the anchovies with a fork until they form a paste, then add pressed garlic and mash once more with the fork to incorporate the garlic into the anchovies. Add the oil and vinegar mixture from the jar and, with a whisk, incorporate the olive oil mixture with the anchovies and garlic until you have a nice creamy vinaigrette. If you are not using right away, store the vinaigrette in the refrigerator in a jar with a tight fitting lid. Bring to room temperature when ready to use.

This will be shared with Foodie Friday at Rattlebridge Farm, Miz Helen’s Country Kitchen Full Plate Thursday & Foodie Friday at Simple Recipes.   
Have a great weekend everyone.