Thursday, June 27, 2013

Italian Style Fresh Tomato Salsa – One of the Best Topping I’ve found to Dress up Chicken or Fish

This is probably one of the best tomato/salsa toppings I’ve found to dress up simple chicken and fish dishes. The flavor of the tomatoes, onions, and kalamata olives seem like natural partners flavored with the balsamic vinegar, garlic, and capers.

I have used this salsa on fish and chicken numerous times lately with great success. Plum or roma tomatoes are reliable year-around, but as summer approaches, I will definitely use local home-grown tomatoes. It takes approximately ten minutes to put this salsa together and is so handy to whip up when you’re grilling outside and want a quick garnish for your chicken or steak. It’s also fabulous with pan sautéed fish.


Here it’s shown with grilled chicken. Crumbled feta cheese can be used as a garnish and a wonderful flavor enhancer.  I’ve used the cheese when I served the salsa with pan sautéed tilapia and we both loved it.

If you are looking for a way to dress up simple chicken and fish dishes, this is it. It doesn’t get any easier or quicker than this and it can be put together in a matter of minutes.


Italian Style Fresh Salsa - one of the best toppings I've found to dress up chicken or  fish
Adapted from Southern Living – makes 2 cups

4 plum tomatoes, chopped
½ small red onion, finely chopped
12 kalamata olives, pitted and chopped
2 garlic cloves, minced
2 tablespoons chopped fresh flat-leaf parsley
1 tablespoon balsamic vinegar
1 tablespoons extra-virgin olive oil
2 teaspoons drained capers
Kosher salt or grainy sea salt
Freshly ground black pepper
¼ cup crumbled feta cheese, optional

Stir all the ingredients, except the feta cheese, together in a medium size bowl. Cover and chill if not using right away. When you’re ready to serve, bring the mixture to room temperature and add feta cheese if desired.


* * *

This will be shared with Foodie Friday at Rattlebridge Farms, Foodie Friday at Simple Recipes, and Seasonal Sunday at the Tablescaper.

Have a great weekend everyone.

Wednesday, June 19, 2013

Kalamata Lemon Chicken with Orzo

We’ve been experimenting with more dishes that call for chicken thighs. I confess that chicken breasts will always be my favorite, but in truth the thighs have more flavor.

I think the aroma of chicken roasting in the oven with kalamata olives and lemons smells like comfort food. From start to finish this takes about 45 minutes, which is relatively quick for most comfort food dishes.

I’ve fallen head over heels in love with orzo and frequently use it in place of rice. For one reason, it cooks much faster and can be ready in under 15 minutes even if you count the time it takes for the water to boil. Brown rice, which is the rice we eat when we eat rice, takes at least 45 minutes from start to finish. Orzo is one of the reasons this dish doesn’t take a long time to cook.

This post, as well as some in the future, is shorter than usual because we’re in the midst of refreshing and remodeling a new house. I will be busy for the next several weeks and I probably won’t be able to get around and visit with my friends as much as usual, and also we may be without the internet until we get settled. Please, just hang in there with me. Things will be back to normal soon.


Kalamata Lemon Chicken
Adapted from Better Homes & Garden – serves 4

1 ¼ pounds skinless, boneless chicken thighs
Kosher salt
Freshly ground black pepper
1 tablespoon olive oil
2/3 cup dried orzo
½ cup drained and pitted kalamata olives
1-14oz can low sodium, low fat chicken broth (or homemade)
1 tablespoon freshly squeezed lemon juice
½ of a lemon, cut into thin wedges
1 teaspoon dried oregano or Greek seasoning
Hot chicken broth, optional, use as needed
Freshly snipped oregano, including the flower if you have it, for garnish

Preheat the oven to 400 degrees F. Season chicken with salt and freshly ground black pepper. In a 4-quart Dutch oven, brown the chicken in hot oil over medium-high heat for about 5 minutes, turning once. Stir in orzo, olives, broth, lemon wedges, lemon juice, and oregano.

Bake, covered, in a 400 degree F oven about 35 minutes or until chicken is tender and no longer pink (180 degrees F). Serve in shallow bowls. Add additional hot broth if you want the dish on the soupy. Garnish with snipped fresh oregano and serve right away.


* * *
This will be shared with Foodie Friday at Rattlebridge Farms, Foodie Friday at Simple Recipes, Seasonal Sunday at the Tablescaper, and On the Menu Monday at Stone Gable.

Have a great weekend everyone.

Wednesday, June 12, 2013

Spicy Fresh Cherry Salsa

It’s fresh cherry season and time to take advantage of them while they are abundant in the market. Normally with fresh cherries I would make a clafouti, a baked French dessert of cherries baked in a thick flan-like batter and dusted with powdered sugar. But I was feeling more adventuresome and settled on a spicy fresh cherry salsa served alongside roasted pork.

The recipe calls for two cups of pitted cherries. In the past I would have used my little handheld cherry pitter and after a while, my hand would start to ache. Thanks to a gift from brother-in-law Stuart, I went through pitting two cups of cherries in record speed. He gave us this handy dandy cherry pitter from Sur la Table and believe it or not, it pits four cherries at a time with one simple motion. The tray reverses to accommodate small and large cherries and also works well as an olive pitter. And it can be washed in the dishwasher. What more could you want from a gadget. Thanks Stu. Your cherry pitter turned a chore into a breeze.

Photo - Sur la Table
I used a combination of fresh nectarines and peaches, but you could use either one you like. It would also be good with a mango if nectarines or peaches aren’t available. No need to waste the left-over pepper jelly. It’s the star of the show in an old Southern appetizer of slices of a toasted French baguette smeared with a little cream cheese or goat cheese topped with a dollop of the red pepper jelly.

This salsa is on the spicy side and if you are shy when it comes to heat, I would suggest you go light on the crushed red pepper flakes. Taste the salsa first and add more pepper flakes to taste. Southern Living served this salsa with griddle cakes, recipe here, which would make a nice breakfast. I chose roasted pork tenderloin, but it would also be delicious with grilled pork or chicken.


Spicy Fresh Cherry Salsa
Adapted from Southern Living – makes 2 ½ cups
Printable Recipe

½ cup red pepper jelly
1 tablespoon lime zest
¼ cup fresh lime juice
¼ teaspoon dried crushed red pepper, or to taste
2 cups pitted, coarsely chopped fresh cherries
¾ cup diced fresh nectarines and peaches, or all nectarines or all peaches
1/3 cup chopped fresh cilantro
1/3 cup chopped scallions, green parts, or chopped chives

Whisk together red pepper jelly, lime zest, lime juice and dried crushed red peppers in a small bowl. Stir in cherries, nectarines, peaches, cilantro and scallions or chives.


Don’t forget that the Google Reader is being retired at the end of this month and you’ll want to transfer the blogs you follow to another service. Both Feedly and Bloglovin’ can easily transfer the blogs you follow from the Reader and new blogs are very easy to add. I am currently using both to see which one I like the best. One of the features I like is that you can put the blogs into categories, such as Food, Fashion, Decorating, Lifestyle, whatever you want. Both have similar layouts to the Google Reader. The end of June is just around the corner, so keep that in mind and don’t wait until the last minute to make the change.


This will be shared with Foodie Friday at Rattlebridge Farms, Miz Helen’s Country Kitchen Full Plate Thursday, Foodie Friday at Simple Recipes, Seasonal Sunday at the Tablescaper, and On the Menu Monday at Stone Gable.

Have a great weekend everyone and happy Father’s Day to all of the fathers out there.


Thursday, June 6, 2013

Breakfast with friends – part of the Annual Blogger Get-Together + We’re Moving Again

As you know from my last post about the 4th annual blogger get-together at the home of Larry of Big Dude’s Eclectic Ramblings and his wife Bev, we spent the weekend partying with fellow bloggers and friends at the lake. You might recall that Penny of Lake Lure Cottage Kitchen’s husband David told Bev & myself about the special treat that he and Penny had in store for us for breakfast the next morning following the luau – and it was going to be shrimp and grits. If you have been reading My Carolina Kitchen for a while, then you know how much I love shrimp and grits.

I can’t wait to taste David & Penny’s version of shrimp and grits with andouille sausage. Andouille, for those of you who aren’t familiar with it, is a coarse-grained, smoked sausage most often associated with Cajun cooking in the US. It originated in France and was taken to the US by French immigrants to Louisiana. Pronounced ænˈduːi/ an-doo-ee in US English and in French ​[ɑ̃nduj]. To me it is a spicy, smoky sausage that brings a lot of flavor to the dish.

While David browns the andouille and bacon and sautés the chopped onion that will go with the shrimp,


Penny grates the cheese for the grits.


David & his helper Meakin put the final touches on the stone ground grits


While the shrimp simmers on the stove.


Here’s a bowl of the finished shrimp and grits, Penny's recipe here, along with her post about it with lots of great pictures. Notice the beautiful 10 to 15 count shrimp they found at their market.


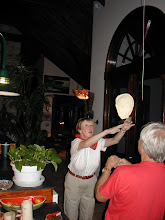
Larry offered to fry an egg for anyone who wanted one on their shrimp & grits – several did.


Penny brought beautiful cranberry orange scones (Penny's recipe here) that she had prepared earlier,


And delicious chocolate biscotti (Penny's recipe here) for dipping in your coffee.


While David was cooking the bacon & andouille, I put together a big bowl of orange slices, red grapes, lightly sugared blackberries, and slices of fresh local mountain strawberries.


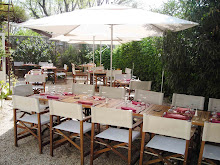
Everyone is seated around the table and ready to dig in to their bowl of shrimp and grits. Thank you Penny and David for this awesome gourmet breakfast. What a wonderful ending to a great get-together with friends and family. And a big thanks to Larry and Beverly for hosting the event. You guys are the best.


As a side note, we’re on the move again. We sold our condo this past January to the first people that looked at it and we’re currently remodeling and refreshing our new house where we’ll spend our winters. During our forty three years of marriage we’ve remodeled more than a dozen houses and really enjoy it. As we get older, we’ve come to realize that we can’t do everything ourselves anymore and have hired people to help us on this project.

If you follow me on Pinterest, then you know that I have as many or more decorating boards as I do food, France, and fashion (my first career). My favorite part of redecorating is choosing the colors and feathering the nest, but I also love to change the layout and re-arrange some of the walls in rooms when it’s called for. See the master bath below.

Our new house is an older home in an established neighborhood with lots of character, older trees, and established landscaping. Like any other older home, it needs plenty of updating. Here’s a preview of what’s going on right now with the crew in the master bedroom and bath.


This is our dining room waiting for the trim carpenter to put down new baseboard down and install cove molding as will be done in all of the rooms. Trim makes all the difference in how a room looks. The sheetrock crew has already been in and removed the popcorn off of the ceiling. Popcorn is a bumpy ceiling finish that was once popular, but now makes a room seem dated.  It is one of the first thing people notice about your house and can affect its value. The reason the popcorn finish was used in the first place was that it was easy for builders to apply and also helped to hide a multitude of sins. It is also a gigantic mess to remove as you can see from this article and best done before you move in while there’s no furniture in the rooms. After the popcorn was gone, the ceilings were lightly skip-toweled in preparation of the painter’s arrival in a couple of weeks.


As much as we would like to re-do the kitchen, it will have to wait until next year. We will really miss our remodeled kitchen in the condo with all of its built-ins and drawers and new appliances. Below is what the kitchen looked like when we first saw the house. It doesn’t look too bad, but with a fresh coat of white paint and the removal of the previous owner’s blue bric brac and valances, it will do for now. We have plenty of time to plan for new appliances and we want a wall oven and hopefully a gas cook top and of course new cabinets with lots of drawers and storage. Fortunately the kitchen offers a great view of the lanai and the pool. We’re also excited that the house faces south, so the lighting should be good all day long in the kitchen (and for taking food pictures).

Kitchen when we first saw the house
As you can see, I will be very busy for the next month or so. I have a couple of posts prepared, but we will be without internet service part of the time. I hope to visit your blogs and continue to post as much as possible, but if you notice my absence, you will know that I’m temporarily up to my ears in projects. Once the remodeling is complete, we’ll pack, move, unpack, and get the house set up for next season. Once we get things back to normal here we’ll return to the mountains to enjoy some cool weather and take at easy during the summer.

This will be shared with Foodie Friday at Rattlebridge Farms, Miz Helen’s Country Kitchen Full Plate Thursday, Foodie Friday at Simple Recipes, and On the Menu Monday at Stone Gable.

Have a great weekend everyone.